Thursday, August 2, 2012

Front wheel painted and putting things together

I sandblasted the front wheel with crushed glass then painted the whole thing white, including the spokes and hub. I did this because getting new spokes is difficult for this bike and finding someone to lace them even more difficult.
Then I taped off all the spokes and hub, except for the spoke adjusters


Then I painted the rim turquoise
Once the tape was removed, I was left with a pretty sharp looking wheel
I assembled as many pieces as I could to get an idea if everything looks good together. I'm pleased with the results so far but am dreading the mounting of the tires and the electrical.

Wednesday, August 1, 2012

Sandblasting

I purchased a small hand held sandblaster and it works pretty good, except I found out that all blasting media is not created equal.
These are tiny steel balls and I used these when blasting carroded aluminum or the cast iron cylinder head. They are hard but don't have sharp edges so they are a little more gentle than the crushed glass

This is crushed glass. I made the mistake of using this on aluminum and it pitted the piece so badly that I had to sand the entire thing to get it smooth again. This stuff works great on getting paint and rust off of steel.

This is crushed walnuts and it is amazing stuff. If you have to pick any one media to use on everything, this is your answer. You can blast paint right off of chrome without damaging the chrome or you can use it to get aluminum nice and clean for polishing. I used this on the entire engine, chrome pieces and all.

This chrome nut on the steering stem was painted so I used the walnuts and the paint came right off and left the beautiful shiny chrome undamaged.

Wednesday, July 4, 2012

Mark's bike-painting has begun

I have never owned anything that is my favorite color-turquoise. I decided this bike would be my favorite color and anticipated some trouble getting the paint shop to mix the color. I found a 1957 Chevy paint code and figured that would be good enough but it was not, they couldn't figure out the formula to mix it. I went through their catalog and found a color I love, love, love and had them mix it, along with a classic shade of white.

I painted the front fender, handlebar mount and shocks but landed up re-doing each one for various reasons.
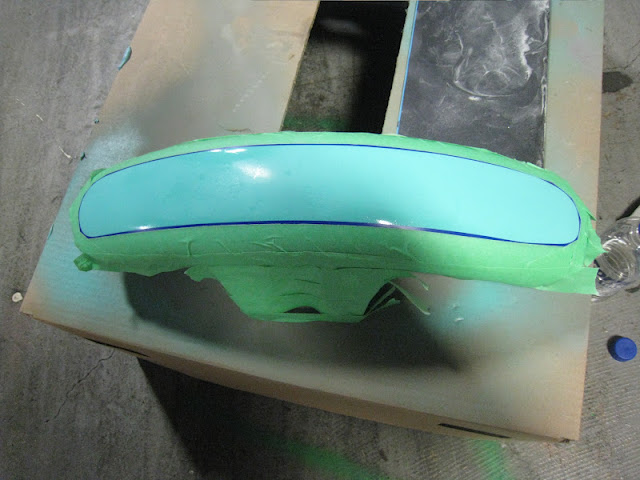
Then I used thin pinstripe to mark off the area that I want to paint white


Then I sprayed it with the white
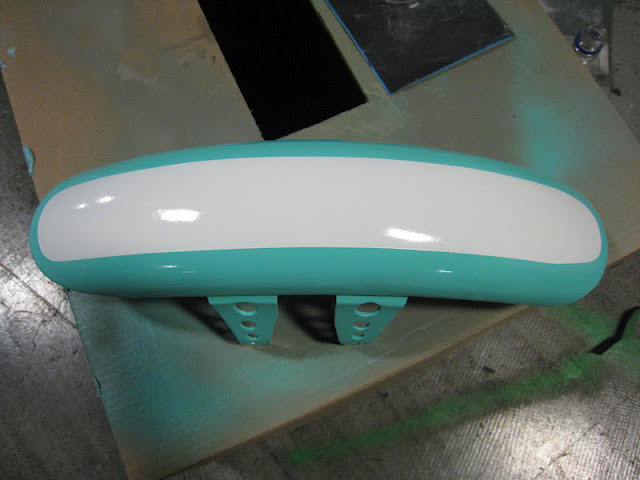
And once the tape was removed, I was left with this
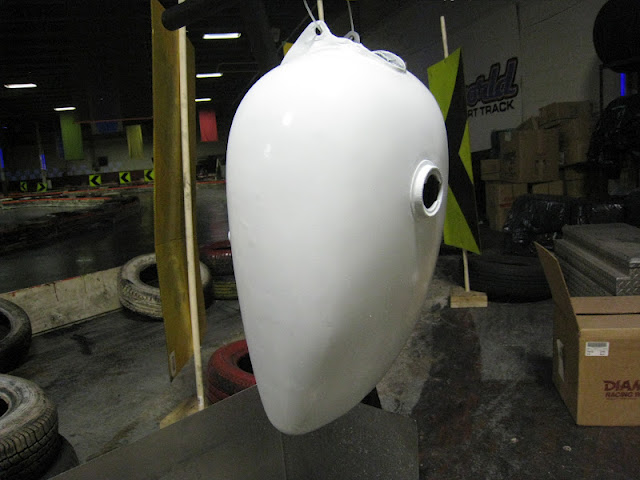
I repeated the process for the fuel tank but this time painted the white first
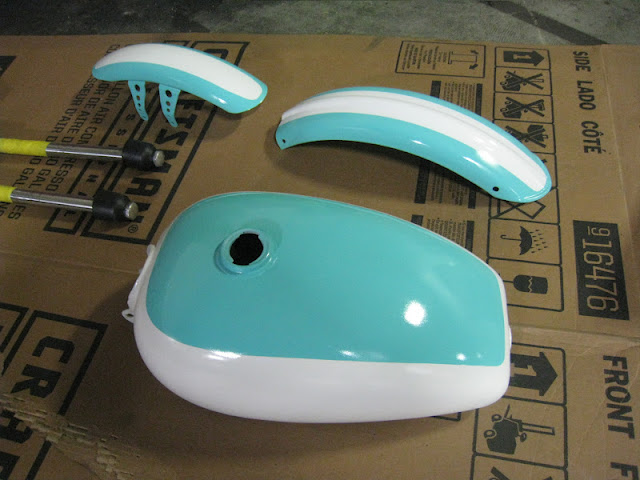
Sorry, I can't get the image to rotate properly, but you get the idea


Wednesday, June 27, 2012

Mark's bike-battery holder

The factory battery box didn't fit with the theme of the bike so I built a bare-bones battery holder out of mild steel.
I used a press to bend the steel and welded this up to hold the battery under the fuel tank and on the right side of the bike.

Mark's bike-seat bracket

I needed a way of holding up the back of the seat and springs didn't look right, so I built this piece

It's just in it's rough form here. Once it is trimmed and welded in, it looks a lot better

Here it is welded in, trimmed and with the seat bolted on. There is just enough clearance between the rear fender and the seat for the rear to go up and down over bumps

Tuesday, June 5, 2012

Mark's bike-rear fender struts

Once I had the rear fender positioned where I wanted it, I marked it with a Sharpie then removed the wheel. I drilled a small hole through the fender and into the swing arm.

Then I ran a tap through the hole and used small bolts to hold the fender in place

I put the rear wheel back on then started attaching the DIY fender strut kit from Lowbrow Customs. I started by bolting the upper bungs to the fender

Then I tack welded the bottom threaded bung onto the swing arm

Then I cut the strut to the right length and welded it in place. I considered different ways of mounting the rear fender and some may have looked better but I think would not have been structurally sound enough for riding the streets of Winnipeg.

Wednesday, May 16, 2012

Ball joints on a motorcycle?

I didn't like the way the frame tubes were just open behind where the shocks mounted and wanted to weld some sort of spike or something on there. An internet search didn't come up with the kind of spike I wanted but while messing around with my race car stuff, I spotted these ball joints from a 1967 MGB-GT. There are polished balls of steel and slid right into the frame tube, so I just welded them on.